Total Pageviews

Showing posts with label cooking. Show all posts

Thursday, January 19, 2012

What to do on a rainy day?

Yesterday was a really wet and rainy day. My man wasn't feeling so good, and I thought about how I can make him happy.

Then I had an idea:
Chocolate cookies.

I looked up and ended up with this recipe for the most amazing chocolate cookies in the world.
עוגיות שוקולד שוקולד צ'יפס 1 (צילום: חן שוקרון ,אוכל טוב)

Ingredients (for 25 cookies)
* 220 gr pure dark chocolate
* 30 gr butter
* 1/4 cup (35 gr) flour
* 1/4 teaspoon baking powder
* A pinch of salt
* 2 Large sized eggs, in root temperature.
* 3/4 cup white sugar
* 1 bag of vanilla sugar
* 150 gr chocolate chips or chopped dark chocolate (in chunks)

Preparation
1. Preheat an oven to 175 degrees Celsius.
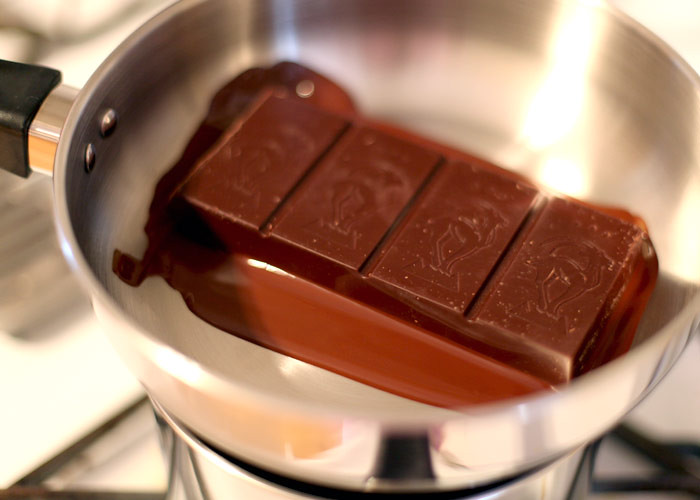
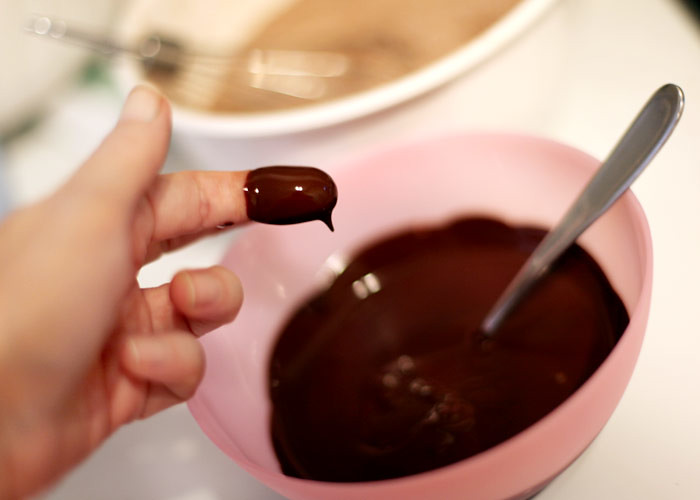
2. Put the dark chocolate and the butter in a bowl , melt them on a banne marie (ontop of boiling water) until you get a smooth mixture. let it get cool.
3. Mix the flour , baking powder and the salt together in a small bowl.
4. In the mixing bowl, mix the eggs with the sugar and the vanilla sugar, until you recive a puffy and light mixture. Continue mixing 5 more minutes. Lower the speed to the lowest speed, and add the melted chocolate. Continue mixing until the chocolate is completely in the mixture.
5. Add the flour mixture from the small bowl and using a spatula fold it in the foamy mixture until the flour is completely absorbed in the mixture.
6. Add the chocolate chips / chopped chocolate until it is homogeneously spread in the mixture.
7. Using an ice cream spoon or 2 regular teaspoons you put an amount of one spoon on a baking paper padded baking tray , keeping big spaces between the cookies (they spread).
8. Bake 9 minutes only. Let the cookies cool completely.
9. You can keep the cookies for up to 3 days in a sealed box in room temperature.


My cookie box is vintage, It has a beautiful print of Wind mills and Dutch houses in a row. I think every box has a story and I wonder what people used to put in them... was it cookies? candy? I am sure it brought joy to someone once


I just have to say: this is the before picture (as you can see I indeed put them in the cookie box)


It took about half an hour and this is what happened:


And so at least my man and his grandpa were very happy:


Now isn't it a nice idea for a very rainy day?

Eet Smaakelijk! :)

Wednesday, January 11, 2012

LOL Dogs and laughter

Yesterday I went to a dutch lesson given by my friend Lisa. She was in London for a few days and came back two days ago.
She bought me a great gift wrapped in beautiful paper wrapping :


And what was inside you ask? well this is probably one of the best gifts I ever got,
My own recipe book ... it's a folder which is empty and has room for my own notes for recipes. It's very beautiful and English, since the first page was "Tea Time", the second "Puddings" (that's so English), and so on... I loved it. Thanks Lis!
All I need now is to put together my own recipe book. I can also cut out some clips from the newspaper. I am definitely going to put the exploding cookies recipe I showed you yesterday in my blog in there... yum. So here it is

Beautiful, isn't it??? I love it all. I really need some more recipes to put in it, so please don't hesitate to give me a link or a whole recipe that I can put in, in the comments of this blog :)

I love to laugh. Laughter is one of the most healthy things for the human body.
What makes me laugh more than anything is stupid picture of animals. Especially LOL Dogs.

Lol dogs are pictures with subtitles or comments below, they are usually very funny and since they include "speaking" dogs they have type o's...
I thought that I would make you guys laugh too... me and my man really love these, so here are a few pictures for you guys, enjoy and laugh your ass off ...

Cheers the lol mad scientist


Tuesday, January 10, 2012

Cookies Cake pops and my new video

Hi to all you cookie monsters out there. 


I have to admit, I am addicted to everything sweet. you name it. 
Everytime I found out a new recipe for cookies, cupcakes etc. I just have to try it out...


So I found out a wonderful website called Bakerella. She makes Cake pops. what is it exactly? it's cake on a Popsicle.  I think the idea is awesome so kudos for her on that. 
I had to show you a few brilliant ideas from her new book Cake pops, and it features, who else than "The Muppets" ... my ultimate favorite colorful friends. 


Here is how to make my favorite Kermit the frog (maybe since I am a little bit like miss Pigi haha)
http://family.go.com/food/recipe-bakerella-1029876-muppets-kermit-the-frog-cake-pops-t/ and this is how it turns out in the end :)


Kermit Cake Pop  


Hi-ho! It's not easy being green, but it's a piece of cake to make these tasty treats.
You'll need:
  • 1 box cake mix (bake as directed on box for 13x9 cake)
  • 1 16 oz can of ready made frosting
  • Wax paper
  • Baking sheets
  • Green candy coating
  • White candy coating
  • Red candy coating
  • Small round candy with white shell (such as white Sixlets)
  • Green jumbo diamond sprinkles
  • Pink jumbo diamond sprinkles (broken in half)
  • Black edible ink pen
  • Squeeze bottle
  • Toothpicks
  • Paper lollipop sticks
  • Styrofoam block
Note: One cake makes about 48 cake pops. If you don't need that many, then cut the cake in quarters and freeze any cake sections for another day. You'll need at least one ounce of candy coating for each Kermit the Frog cake pop you plan on dipping and more for any extra decorating.
Instructions:
1. After cake is baked and cooled completely, crumble into a large bowl.
2. With a large spoon, mix thoroughly with about 3/4 of the can of frosting. You won't need the rest.
4. Roll mixture into quarter size cake balls and place on a wax paper covered baking sheet.
5. Place cake balls in the freezer for about 15 minutes to firm up. You can transfer them to the refrigerator to keep chilled and avoid freezing.
6. When they are firm, shape the cake balls to resemble Kermit's head. Start out by shaping them to look like a teardrop.
7. Use a picture of Kermit as a guide to help shape the cake ball. You can also use a lollipop stick to help shape the mouth. Press the stick into the pointed end of the teardrop shape to make an opening in the mouth. Continue shaping to form an open mouth with a defined top and bottom.
8. Return the cake pops to the refrigerator to maintain firmness.
9. Melt green candy coating in a heat-proof plastic bowl so that the coating is at three to four inches deep for easier dipping. You can also add a little white candy coating when heating to create a lighter shade of green. Melt in the microwave in 30 second intervals on low, stirring in between. Repeat until melted and smooth.
10. Remove a couple of shaped cake balls from the refrigerator at a time to work with.
11. Dip the tip of a lollipop stick into the melted green candy coating and insert stick into the bottom of Kermit's head. Dip the entire cake pop into the bowl of melted candy coating. Dip and remove in one motion without stirring. Make sure the entire cake ball is covered. Using a deep bowl is helpful here. If your coating is too thick, you can add a little vegetable oil or shortening to help thin it and make it easier to work with.
12. Remove and allow any excess coating to fall off the pop and back into the bowl.
13. Before the coating sets, place two round candies with white shells in position for eyes. Repeat with the remaining Kermit pops.
14. Place in a styrofoam block to dry.
15. When dry, pipe melted red candy coating on the bottom part of Kermit's mouth and gently place a pink diamond jumbo sprinkle in position for the tongue.
16. Use a toothpick to work red coating around sprinkle if necessary.
17. When dry, use a toothpick to place a small amount of green candy coating around the bottom of Kermit's head and place four green diamond sprinkles around the stick to form Kermit's collar.
18. Use a black edible ink pen to draw details on the eyes.
19. Let dry completely.
20. You can wrap in treat bags tied with a ribbon and/or store them on the counter or in an airtight container for several days.
21. Enjoy


now how wonderful was that. you know what is even better? finding out your favorite exploding cookies recipe .
I guarantee these are the most amazing chocolate cookies you have ever had and you wouldn't be able to stop eating them... 


IMG_5775


Ingredeients: (for about 4 dozens cookies yay!)


  • 8 ounces bittersweet chocolate, melted and cooled
  • 1 1/4 cups all-purpose flour
  • 1/2 cup Dutch cocoa powder
  • 2 teaspoons baking powder
  • 1/4 teaspoon salt
  • 8 tablespoons (1 stick) unsalted butter, room temperature
  • 1 1/3 cups light-brown sugar, firmly packed
  • 2 large eggs
  • 1 teaspoon pure vanilla extract
  • 1/3 cup milk
  • 1 cup confectioners' sugar, plus more for rolling

Directions (http://www.bakerella.com/chocolate-crackles/)


    IMG_5593
    IMG_5624
  1. 1. In the bowl of a heavy-duty electric mixer fitted with the paddle attachment, beat butter and light-brown sugar until light and fluffy. Add eggs and vanilla, and beat until well combined. Add melted chocolate. With mixer on low speed, alternate adding dry ingredients and milk until just combined. Divide the dough into quarters, wrap with plastic wrap, and chill in the refrigerator until firm, about 2 hours.Heat oven to 350 degrees. Chop bittersweet chocolate into small bits, and melt over medium heat in a heat-proof bowl or the top of a double boiler set over a pan of simmering water. Set aside to cool. Sift together flour, cocoa, baking powder, and salt. 
  2. On a clean countertop, roll each portion of dough into a log approximately 16 inches long and 1 inch in diameter, using confectioners’ sugar to prevent sticking. Wrap logs in plastic wrap, and transfer to a baking sheet. Chill for 30 minutes. Cut each log into 1-inch pieces, and toss in confectioners’ sugar, a few at a time. Using your hands, roll the pieces into a ball shape. If any of the cocoa-colored dough is visible, roll dough in confectioners’ sugar again to coat completely. Place the cookies 2 inches apart on a Silpat-lined baking sheet. Bake until cookies have flattened and the sugar splits, 12 to15 minutes.
  3. Transfer from oven to a wire rack to let cool completely. Store in an airtight container for up to 1 week.

IMG_5613 IMG_5633 IMG_5618 IMG_5644 IMG_5697 IMG_5661 IMG_5684 IMG_5707 IMG_5671


Now wasn't that sweet...


If we are talking about being a cookie monster, here is one video I love. It includes the cookie monster and my ultimate favorite Martha Stewart... 


I love when he says Cookies like Novocaine, I can so totally understand him. Gotta love you blue fellow... 


I decided to make a video for my new song Stuck. This time I chose to use picture that weren't found on the web. They include me being mostly happy. 


Stuck was written and composed by me (Tula) and with the kind help of a dear musician friend (Attila Mazan) , who did a great job, it now sounds amazing. 


Please comment to tell me what you think of my music , I would really appreciate it... 


I love music, don't you? 
Signing off , the mad (sweet) scientist of music